07
Feb 13

Sara Kay’s Meatballs of Glory!

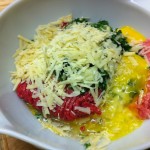
Queen Bean PotAbout: Meatballs are found in almost every culture, and can be dated back to 700 BC. They are, in essence, portable baby meatloafs. The purpose is to cut meat with other protein, starches, and veggies, to boost their nutrient value while stretching the meat. I have been a huge lover of meatballs forever — however, when my husband discovered his gluten allergy, I had to figure out how to adjust my recipe to accommodate.  This is my low carb, gluten-free version of a Southern Italian meatball.

Prep Time: 10 min

Cook Time: 30 min at 375 °

 Difficulty: Easy

Servings: 6 (4 balls each)

Calories per serving: 433

Carbs Per Serving: 2

Best Pairing: This really depends on what sauce you are serving the meatballs with… but assuming you are using a fresh tomato-based sauce, there is no better way to go than a rootie-tootie fresh and fruity red such as  Negroamaro from Puglia. The best part is that you can usually find one of  these at a wine store for that $10 sweet spot!

Tools Needed: Meatball Prep

  • Frying pan
  • Knife
  • Cutting board
  • Spatula
  • Bowl
  • Baking dish
  • Your hands
  • Latex gloves (Optional)

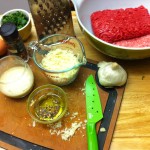
IngredientsMeatball bowl

  • 1 lb lean ground beef
  • 1 lb ground pork
  • 1 small onion finely diced
  • 2 eggs
  • 1 cup of shredded pecorino
  • 1 cup of shredded parmesan
  • 1/4 cup fresh Italian parsley
  • 2 cloves of garlic minced
  • 1/4 cup whole milk
  • 2 tbl saltMeatball Kneeding
  • 1 tbl black pepper
  • 1 tbl extra virgin olive oil

How To: 

  1. Pre-heat your oven to 375°
  2. Dice your onions and mince your garlic
  3. Heat frying pan on medium heat with 1/3 of your olive oil in it
  4. Add onions and cook til translucent, stirring often (about 3 min). Add your garlic for the last 30 secs to open up its aromatics
  5. Remove to bowlMeatball Balls of Joy
  6. Roughly chop your parsley and add to bowl
  7. Add the rest of the ingredients to bowl
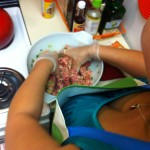
  8. Put on gloves (if you wish), I find with gloves it helps keep the meat from sticking to my hands, helping me form the perfect ball.
  9. Knead all of the goods with your hands until fully integrated
  10. Use the rest of your olive oil to coat your baking dish
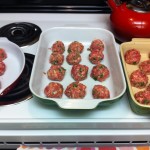
  11. Form the meat mixture into 1″ balls and place with a bit of space between them in the dish
  12. Place in the oven and bake for 25-30 min (until tops are browned)
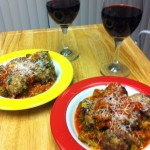
  13. Serve with your favorite greens, & sauce.
    • For a great recipe for fresh sauce check out The Puglian Cookbook by Viktorija Todorovaska http://www.facebook.com/ThePuglianCookbook
    • Tip: If you do not eat all of these in one setting, you can keep them in the refrigerator for up to a week. I sometimes like them for lunch with a little spicy ketchup.

Meatballs finished I hope this dish hits the Spot!

As always, feel free to share, or ask me any questions you may have.


20
Nov 12

Spirit Lab: Gin

As the holidays are approaching, I am going to feature the history of classic spirits to provide a better love and understanding for these products.

I decided what better spirit to start with then the first one I ever enjoyed drinking all by itself: Gin.


Historical Time Line:

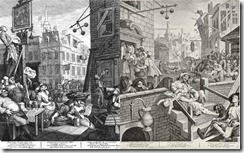
  • 1550 -16oo-Dutch professor of medicine Dr. Franciscus de la Boë  created a juniper and spice-flavored medicinal spirit that he promoted as a diuretic. There are some who claim thatGin Paintinh Antoine de Bourbon, Count de Moret of France actually invented gin by blending a grape based distillate with Juniper and calling it Juniper Wine… I will chalk this up to the mysteries of collective consciousness.
  • 1580s-The tasty spirit was found  in Holland by British troops who were fighting against the Spanish in the Dutch War of Independence. They gratefully drank it to give them what they soon came to call “Dutch courage” in battle.
  • 1600s-The Dutch were encouraged by their government to favor grain spirits over imported wine and brandy by lack of excise taxes on local drinks.
  • 1720s-Dutch Protestant William of Orange and his English wife Mary became co-rulers of England after the “Glorious Revolution.” They banned the import of Catholic-made wine, causing about a quarter of the households in London to make their own gin. Mass drunkenness became a serious problem.
  • 1736- Gin Act of 1736(Prohibition FAIL #1)- Government tries to prohibit gin production, resulting in massive illicit distilling and the cynical marketing of “medicinal” spirits with fun names such as: Cuckold’s Comfort and My Lady’s Eye Water.
  • 1800-1900s- Major government reforms in Europe improve production and materials, and slowly transform gin’s image away from drunk disheveled street urchins swilling rotgut gin, to a spirit of class and culture.Bath Tun Gin
  • 1600s-1900s- Gin is a back seat player in the North American spirits game.  Paul Revere and George Washington were notably fond of gin, and the Quakers were well-known for their habit of drinking gin toddies after funerals.
  • 1920s-(Prohibition FAIL #2)- The US prohibition act gave rise to bathtub gin, jazz, mob-run speakeasies, US cocktail culture, and the swankiest counterculture in US history.
  • 1930s-1960s- It was the dominant white spirit in the US, made famous by “three martini lunches.” It was the image of class, and success.
  • 1970-1980s- Was unseated in the US by vodka & wine, ironically by another counterculture movement who deemed gin a symbol of “the Man.” It was even betrayed by James Bond, who ordered a vodka martini instead of a gin martini… Shame on you Mr. Bond!
  • 1990s-As the US economy got bigger and better, so did its thirst for gin. The power martini was back in fashion.
  • 2000-2012- The rise of mixology and micro-distilleries. This is the time of making cocktails & spirit production an art, sometimes in new and inventive ways and sometimes by perfecting and refining old traditions. Either way it is a very exciting time to be a gin drinker.

What’s In A Name?:

The name gin is an English shortening of Genever, the Dutch word for juniper.

Development of Style:

Victorian era England in the mid-19th century ushered in a low-key rehabilitation of gin’s reputation. The harsh, sweetened “Old Tom” styles of gin of the early 1700s slowly gave way to a new cleaner style called Dry Gin.

This style of gin became identified with the city of London to the extent that the term “London Dry” Gin became a generic term for the style, regardless of where it was actually produced.

Ladies who lunch sipped sloe gin (gin flavored with sloe berries) while reading Bronte. Incidentally, I desperately want to taste a sloe berry!

There are three commonly recognized distillation styles for gin:

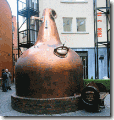
    1. Pot StillPot distilled gin- It represents the earliest style of gin, and is traditionally produced by pot distilling a fermented grain mash (malt wine) from barley and or other grains, then redistilling it with flavoring botanicals to extract the aromatic compounds. A double gin can be produced by redistilling the first gin again with more botanicals. Due to the use of pot stills, the alcohol content of the distillate is relatively low; around 68% ABV for a single distilled gin or 76% ABV for a double gin. This type of gin is often aged in tanks or wooden casks, and retains a heavier, malty flavor that is appealing to whiskey lovers. This method is loved by many artisans and purists.
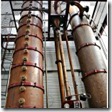
    2. Column distilled gin-This method came after the invention of the coffee still and is produced by first distilling high proof (e.g. 96% ABV) neutral spirit from a fermented mash or wash using a refluxing still.  The fermentable base for this spirit may be derived from grain, sugar beets,  grapes,  potatoes,  sugar cane, plain sugar, or any other material of agricultural origin. The highly concentrated spirit is then redistilled with juniper berries and other botanicals in a pot still. Most often, the botanicals are suspended in a 05.GVine-Column-Still-150x150‘gin basket’ positioned within the head of the still, which allows the hot alcoholic vapors to extract flavorings components from the botanicals. This method yields a gin lighter in flavor than the older pot still method, and results in either a distilled gin or London dry gin, depending largely upon how the spirit is finished.  This is how many of the larger gin houses produce their product.
    3. Compound gin- is made by simply flavoring neutral spirits with essences and/or other ‘natural flavorings’ without distillation, and is not as highly regarded as distilled gin.


There are four labeling distinctions: (With an endless number of smaller distinctions)

  1. Juniper-Flavored Spirit Drinks – This includes the earliest class of gin, which is produced by pot distilling a fermented grain mash to moderate strength (e.g. 68% ABV), and then redistilling it with botanicals to extract the aromatic compounds. It must be bottled at a minimum of 30% ABV. Juniper-Flavored Spirit Drinks may also be sold under the names Wacholder or Genebra.
  2. Gin – This is a juniper flavored spirit made by simply adding approved natural flavoring substances to a neutral spirit of agricultural origin. The predominant flavor must be juniper.
  3. Distilled gin – Distilled gin is produced exclusively by redistilling ethyl alcohol of agricultural origin with an initial strength of 96% ABV in stills traditionally used for gin, in the presence of juniper berries and of other natural botanicals, provided that the juniper taste is predominant. Gin obtained simply by adding essences or flavorings to ethyl alcohol of agricultural origin is not distilled gin. It is the most common way.
  4. London gin – London gin is obtained exclusively from ethyl alcohol of agricultural origin with a maximum methanol content of 5 grams per hectoliter of 100% ABV equivalent, whose flavor is introduced exclusively through the re-distillation in traditional stills of ethyl alcohol in the presence of all the natural plant materials used, the resultant distillate of which is at least 70% ABV. London gin may not contain added sweetening exceeding 0.1 gram of sugars per liters of the final product, nor colorants, nor any added ingredients other than water. The term London gin may be supplemented by the term “dry”. It is the traditionalist method.

Cocktail Culture:

Cocktails seem to have been birthed out of the British military, particularly the officer corps. Hundreds of gin-based mixed drinks were invented and the mastery of their making was considered part of a young officer’s training (If this was still a thing I might have enlisted.) The best known of these cocktails, the Gin & Tonic, was created as a way for Englishmen in tropical colonies to take their daily dose of quinine, to ward off malaria. Modern tonic water still contains quinine, though as a flavoring rather than a medicine.  As we have already discussed, the US gin cocktail culture was at its peek from the 1920s-1960s, with a mini pop in the 90s, and a boom now.

There are a million gin cocktail recipes to be found, and a million more being invented by mixologists every day. Below are a few classics you may want to experiment with:

  • Fallen Angel
  • Gibson
  • Gimlet
  • Gin and Tonic
  • Gin Fizz
  • Gin Rickey
  • Moon River
  • Martini
  • Negroni
  • Old Etonian
  • Pink Gin
  • Ramos Gin Fizz
  • Satan’s Whiskers
  • Singapore Sling
  • The Last Word
  • Tom Collins
  • Vesper
  • White Lady

Stay Tuned:

Throughout the year I will be posting shows on how to make seasonal cocktails, highlighting some of my favorite producers. This month I will be featuring Martin Miller’s Gin, with some fun holiday cocktails. I will try to resist growing a fancy mixologist handlebar mustache, but I can’t promise anything. After all, it is Mo-vember.


10
Oct 12

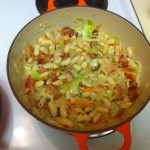
Sara Kay’s White Beans & Bacon

About: This is my take on a tasty fall time Medieval English dish. It is great as a meal, or a side, and if you follow a low-carb diet is surprisingly healthy.

 Prep Time:10 min

Cook Time: 10 min

Difficulty : Easy

Serves: 2 meal/ 6 side

Best Pairings:

B&G Vouvray 2009 The silky pair and bruised golden apple notes are perfect companion to this heart warming dish, and the racing acidity helps cut the fat.

Game of Thrones!

Tools:

  • Large Sauce Pan (I used at Le Cruset Cast Iron Pot)
  • Cutting Board
  • Knife
  • Tongs
  • Spatula

 Ingredients:

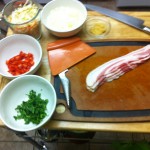
  • 4 pieces thick center cut bacon, roughly chopped
  • 1 small onion, chopped
  • 2 cups shredded cabbage (I used the bagged coleslaw mix w/ carrot shreds from the grocery store… it is a cheap tasty time saver)
  • 2 large garlic cloves, chopped
  • 2 cups white beans/ rinsed (Cannellini, usually in the “ethnic” isle at the store)
  • Salt   (I always use Maldon Sea Salt!!)
  • Pepper


Directions:

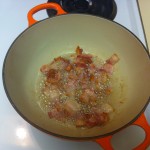
  • Cook bacon over medium to high heat in a large saucepan until crisp.(Tip: You know it is cooked when it starts to foam)
  •  Remove bacon from pan and set on paper towel to drain.
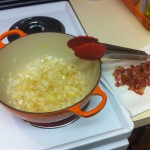
  • Add onion to drippings, and sauté till tender.
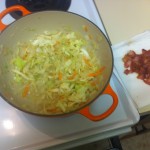
  • Add half the cabbage and cover pot, cooking until cabbage is wilted.
  • Add remaining cabbage and garlic, stir and cooked till endive is wilted.
  • Add beans and bacon, cooking until the beans are heated through, stirring often.
  •  Season with salt and pepper and serve.
 Let me know if this dish hits the spot!


28
Sep 12

Sara Kay’s Top 10 Cellar Management Tips

1.       Less Is More:

There are many schools of thought as to the proper system of cellar management. After working in many cellars with many different teams of people, they only constant I have found is that there are no finite rules. The best thing to do is to figure out what your organizational style is and go from there. Also, keep your system simple. If you are anything like me you constantly wish that you could jam another day in your day, but alas that is not possible! So set yourself up for success and make a system that hits all the basics and still fits into your already busy schedule. Remember “perfect” is much better in theory than in practice.

2.       Lighting, Temperature, & Positions are Everything:

  • Lighting- Wines should be away from bright hot lights! This goes beyond just sunlight. If you have a show cellar, you may be tempted to point some dazzling spot lights on your prized possessions, or if you are short on space you may want to put your cellar close to the kitchen and its heat lamps, but these are not good ideas. You want soft lighting at all times, with the least amount of heat emission possible. Anyway, it makes your cellar more romantic. (That  being said do not make it so dark that you cannot read labels… that slows productivity & can cause staff to pull and sell incorrect wines)
  • Temperature- Of course there is a perfect temperature for every bottle, and for the right price you can purchase a cellar that has special temperature controlled compartments for all of your exacting needs. But if you have a budget that is slightly less than out of this world, I recommend storing all of your wine–white, red and sparkling–at 50-59 degrees. (This is also a much more bearable temperature to work in then 35). It is also a great temperature range to taste both whites and reds, however keep ice baths on hand for serving sparkling…. and white for some of your customers who will not buy the “whites should not be beer cold” spiel.
  • Humidity- Swamps are good for very few things… and wine is not among them. Humidity can affect the temperature of your wine, but most importantly it will damage your wine’s label, which affects its value and presentably. Would you buy a $600 Bordeaux with a wrinkly, stained, and peeling label?
  • Position- It is true that not all wine needs to be laid down… but if you have space to then you may as well do it. (But make sure you can do it safely, so that the bottles do not fall and break, or hit someone in the head…. I have some war wounds.)  If you do not have space to lay everything down then I recommend that you find room to lay down your age-worthy wines, and sparkling wines, as they benefit from it the most.

3.      Follow Your Life Lines:

It is important to know the life span of each of your wines, this way you can strategize how to move your wines before they die. It benefits no one to store dead wine, and more over it does your program damage to serve it.

4.       Be Flexible With Your Storage:
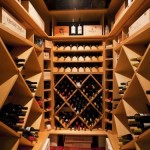
I know how tempting it is to design a cellar with a perfectly fitting sleek little spot for each bottle, however if there is one constant I have noticed in wine is that there are NO Constants. A wine program is a living, growing, changing entity. So your storage area should be equally flexible.  You should be able to add and subtract wines with little effort, and without having to totally overhaul your tracking and organizational system with every new order.

5.   Make A ½ Day Every Week “Cellar Time”:

Let me start by saying that if you cannot stand detailed, repetitive tasks, then you should not be in charge of keeping your cellar in order, so find someone on your staff whose temperament and integrity fits the task. If you are up to the challenge, I recommend making a half-day of every week “Cellar Time”. I recommend doing this on the day of your deliveries, or the day after. I also recommend that this not be a busy business day for you. That way you can be focused on the task at hand. This is the most effective way of tracking your wines, putting them in their place, creating strategic sales tactics, and keeping an up-to-date log of purchases, loss, breakage, and theft.

6.       INVENTORY!!!!!!!-

This is the most tedious and also the most essential thing you can do for your cellar. It is the best way to know exactly what you have, find wines that have wandered to the wrong place, and also ones that have wandered away. I always recommend doing this with a team of two people, so that one person can find the wines, and one person can record them. This also creates a built in checks and balance system so that no one has an opportunity to fudge the numbers. I recommend doing this quarterly. (Spot checking is not sufficient!)

7.       Don’t Have Too Many Hands in the Cookie Jar:

Obviously everyone that sells wine will have to be able to navigate the cellar. However, I find it wise for there to be just one or two people in charge of entering wines into your system.  There is less room for error, or unexplained mysteries this way.

8.     Make Your Key Easy To Read & Update:

It is important to have a key that tracks your cellar, and that is organized in the same fashion as the list that your guests see. This make navigating it easy for everyone. Here are some basic things that you should consider including in each wine entry on your key:

  • Bin number
  • Location/Locations Stored
  • Full Title of the Wine
  • Vintage
  • List price
  • Your cost
  • Distributor
  • Date Purchased
  • Importer (if applicable)
  • Life Line
  • Notes- i.e.: fun facts, aging notes, discounts, replacements.

9.       There are NO Good Vibrations:

Keep your cellar away from vibrations! This means anything from a jackhammer, to bass from your hip Friday night DJ. It can disturb sediment, improperly age wine, and in extreme cases knock wines out of storage and break them.

10.     Do Not Buy More Then You Can Hold:

I know that closeout  sales seem all too good, but as one who has worked on every end of the sales chain of this industry… they come around all the time. It does you no good to buy more then you can store. If wine cannot be stored properly it kills your investment. Also if you over-buy, you could be blowing your budget.

I hope these tips help!

Please feel free to post any thoughts or success stories. 

As always if I am in your area I am available for all your cellaring needs.